Monday, November 8, 2010

A Spanish Inspired Wedding Cake


Here is a beautiful wedding cake done for a wonderful couple here in Riverside. The bride loves the look of Spanish talavera tiles so I had incorporated those into the final design. The bird that you see on the center tiles were part of the overall theme of the wedding invitations and other aspects of the ceremony.
The top tier of the cake was three layers, two blue velvet and one white cake. The bottom tier is my signature triple chocolate cake all tiers are covered in buttercream.
Each tier was finished off with over 300 hand rolled fondant beads and hand cut fondant tiles attached to pegs. Each tile was then adorned with blue hand piped beads.

A "Dash" for the finish line...


Here is an organic cake done for a 5 year old birthday party...his name is Dash. The mom dropped off all organic and vegan ingredients to make this cake and a vegan 11" cupcake cake for her sister.
I have to say as scary as it was to delve into vegan cooking the end product was actually quite good. The cake batter cooked up pretty much like normal cake batter and it tasted great as well.
This #5 cake was cut out by hand and is two layers of my grandmothers white cake recipe and lemon curd center. The "road" is fondant and the rest was done in buttercream topped off with really cool hot wheels cars.

Monday, October 11, 2010

Cowgirl up!


Here is a fun red velvet cake done for a lady who loves Country and Cowboys! This was a basic 2 layer red velvet cake, frosted with buttercream and fininshed off with fondant cow spots, pink fondant rope and bandana print.

Canadian Wedding Cake


This cake was baked by the client and given to me for the final decorative touches. Each layer is a traditional fruit cake that has been basted in Grand Marnier for about 6 months and it is delish!


The top 5.5" layer and bottom 8" layer were covered in marzapan then given to me to cover in fondant. I used a pre-tinted, chocolate flavored fondant on the top layer and finished off with stripes and decorative balls. Bottom layer was covered in traditional white fondant and given the diamond treatment with complimenting hand rolled buttons.


The whole thing was finished off with hand rolled chocolate fondant balls and placed on pewter stand.


The bride actually took a peek at the final product and was brought to tears! It was definitely worth being there to witness her appreciation for this cake.


Thanks to the grooms family for allowing me to be a part of their family's special day!

Thursday, October 7, 2010

Fun with Cupcakes...Its Just Not Cakes Anymore...


Cupcakes are the new thing and they are so versatile! Here are images of cupcakes requested by my many clients for various parties. With these little delights the possibilities are endless! Whether its using crackers, candies, marshmallows or frosting techniques I can set the theme of your party! If you have a need for an unusual cupcake, don't hesitate to contact me and ask...you'll be amazed in what we can come up with.
Thanks for taking a look!


Friday, October 1, 2010

Say Cheese

This was a tough one but a fun challenge! I was asked to do a camera cake for a local photographer's birthday. I tried my darndest to get the camera to look like a legit photographers camera...very difficult but the client was pleased and that's all that matters.

The cake itself is my signature red velvet covered in cream cheese frosting. The camera is my butter cake which has the density needed to shape and stack to get the achieved shape. I covered the camera in buttercream then covered it with black fondant. The lens is actually a crystal light drink mix tube cut in half and decorated with black fondant to give the apppearance of a camera lens.

Pink and Perky Bridal Shower


So this corset cake and matching cookies were done for my friends bridal shower. I used two heart shaped pans for the corset body and cut off the bottom tips of the hearts and placed them together. The cake itself was chocolate with chocolate pudding filling. I covered the cake with buttercream. The "boobs" are cupcakes put in place with dowels and covered in buttercream...I have to laugh because the boobs started off as cute little "A" cups and ended up "DD"'s! I just kept adding frosting...what can I say!


Thursday, September 30, 2010


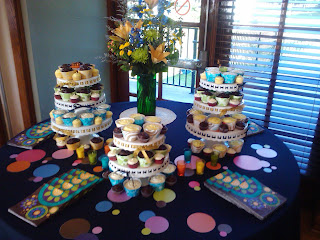
This was a fun wedding reception that was held at the boathouse at Fairmont Park, Riverside. The theme was the 60's, but not like in an Austin Powers kinda way but in a traditional 1960 genre.
We did these cupcakes on vintage stands adorned in gold and navy blue ribbons. The cupcakes were placed in psychedelic wrappers and were accompanied by mini cupcakes to give the presentation some depth. Flavors included red velvet, lemon, and chocolate.
As the sun set, mini candles on the table and on the stands were lit to give this presentation a warm and inviting feel.

Natural June Wedding

So June 12, 2010 was a wonderful opportunity to do this fun, woodsy cake. The couple liked the idea that my cake batter and frostings are made from fresh, all natural ingredients so they asked me to do this cake using my vanilla bean cake batter and topped it off with a margarita lime frrosting. It was a wonderful pairing of flavors for a hot June day. The bride requested these willow twigs be applied to the cake as birds and sticks were the theme of the reception.

Friday, July 16, 2010

Pretty Princess Party


So, this has to be one of the cutest parties I have assisted in. It helps when you have a totally creative client who pulls out all the stops. My only part in this was the small polka dot cake for the birthday girl and 30 cupcakes (which 3 of them were sacrificed on the drive to deliver them. Some guy pulled out of a local side street and nearly t-boned my car so when I slammed on the brakes, the cupcakes went flying).


The birthday girl wanted all pink cake so everything was strawberry flavor. The frosting was my homemade buttercream and swirled on in a girly/cutesy style and tinted to compliment the party colors. Of course we used coordinating cupcake papers.


The mini cake was a 6 X 4 inch round strawberry cake covered with hot pink fondant and finished off with coordinating polkda dots.
More information on this party can be view on "The Savvy Mom's Guide" blog under the birthdays link.


Purse Cake

This was a purse cake done for a co-workers birthday! It was just round cakes cut in half, frosted with buttercream. The handle is actually a 9" long tootsie roll and the flowers are marshmallows and whoppers. It was a great presentation.

May Cupcake Wedding


This was my first cupcake wedding. It was so much fun assembling this 3 tier cupcake stand with 300 cupcakes! Flavors included triple chocolate, lemon, strawberry and red velvet. Each was topped off with a frosting rosette and placed in a handcup wrapper.
The bride and groom opted for a giant 11" cupcake as their cake to cut into.
The final presentation was fantastic!

April Showers Bring May Flowers


This May Flowers theme birthday party was for my niece's 1st birthday party. It was a flower theme so the cupcakes were adorned with different type of flowers like oreo cookie sunflower complete with m&m's ladybug, marshmallow mums, and candy melts pansies. My nieces personal birthday cake was a 8" chocolate cake covered in buttercream and finished off with her own ribbon maypole. The larger cake was chocolate cake and finished off with buttercream and fondant flowers and balls. The overall presentation was springy and fun and my niece had a blast!


A "Vintage" 50th Birthday


This was by far the best party I have done and the longest in preparation as well. It was done for my brother-in-laws 50th birthday party which was a wine themed party. This job took over 3 weeks to complete but was worth every minute. Everything you see here is edible. The "cheese" wedges are yellow cake covered in fondant, the grapes are rolled up fondant and the crackers are just circle fondant discs. The wine barrel is 6 layers of 2" thick chocolate cake layers shaped into a barrel shape, covered in buttercream and finished off with fondant that was hand tinted and rolled out to mimic wood grain. After applying the fondant, I used a pizza cutter to roll the indent of the wooden slats. After that I added the "metal" straps and topped off with more fondant grapes. The woode wine buckets are gumpaste slats that were adhered to the side of 4 2" layers of chocolate cake. The wine bottle in each bucket is gumpaste formed over a wine bottle and labels from his favorite winery were printed and laminated and added to the bottles for a realistic effect. The birthday boy was quite happy with his cake presentation.

Lambs N Ivy Style Baby Shower


This cake pattern was based on the bedding of the babys room...an exclusive pattern from Lambs n Ivy. The cake was white cake with fresh strawberry and strawberry glaze filling covered in homemade buttercream frosting and finished off with the fondant. Fondant balls, flowers and butterflies adorn this cake. Order was complete with 25 butterfly sugar cookie favor pops.

Just Ducky Baby Shower


Here is a 3D duck cake done for a boy baby shower. The mom ordered matching duck sugar cookie favors.

Candlelit Birthday Cake


So, here is a birthday cake for a one year old. This is also the cake I decided I would try to make homemade fondant for...totally messy but it worked out. Turned out it was more forgiving than store bought fondant but it didn't set as well or roll up and hold its shape well either. It worked ok for this cake since there wasn't much intricate work.
The colors were based on the party invitations...that is where the candles at the base come from as well. All of the candles, dots and stars are cut out from the homemade fondant (which is just a bag of marshamallows melted and combined with shortening and loads of powdered sugar until you get the consistency of fondant. You get really soft hands after almost 30 minutes of having them encased in shortening...so the hot marshmallows don't stick to your hands). The stars were cut out a few days prior and stuck with florist wire until they were dry.
Each tier was a different flavor: vanilla, strawberry and chocolate. Each was covered in my homemade buttercream frosting then covered with fondant and decorated with dots or candles. Then stacked up and finished off with the balls and voila! Cake complete.

Thursday, July 15, 2010

This is really where it all got started...


This is a topsy turvy cake or also known as a Mad Hatter cake because of its unusual shape. This is definitely one of my favorites; not only because I mastered this technique on my first try but because it was created for a baby shower to welcome my niece!

My nieces bedding was ladybugs and dragonflys so it was only appropriate to do a cake to match her bedroom theme.

This cake was "gi-normous"! It was two tiers of chocolate cake and one tier of white cake. Each layer was covered in homemade buttercream frosting and covered in light pink fondant. The actual technique of creating this topsy turvy style was super difficult and time consuming. Total hours put into this cake was 19 hours, baking time included. Each layer was stacked with graduated sizes of cake, stuck together with buttercream, then the sides were shaved down to get "the look". The top layer was a crazy technique of slicing the top layer on the diagonal, turning the top piece around to give it a tilt, then cutting out a center circle the same circumference as the layer above and frosting it all smooth to cover it with fondant. Fondant for those of you who are not familiar is a play-dough like material that you kneed color into (until your arms go numb) and then roll it out until its large enough to cover the surface (a great ab workout) and carefully smooth it down until it becomes one with the cake. It gives the cake a great sheen that traditional frosting cannot.


The leaves, ladybugs and flowers were all created out of gumpaste, another interesting material I like to use. Again it requires kneeding (you would think I would have fabulous arms doing all this kneeding and rolling) and you can cut shapes out and let them dry a week or so or roll up 1 inch balls and form into ladybugs. The eyes and black dots are just itty-bitty balls flattened and adhered with water to the bugs body. The green vines are just piped on with frosting and the pink balls are used to cover the unfinished edges between each tier.
I do believe this cake got a few "oohs and ahhs" which made it all worth while not to mention I heard it was pretty tasty as well.

In the Beginning...

So...many people I know blog for different reasons and it occurred to me that I could blog my various cake jobs. This would give me an opportunity to elaborate on each cake, sharing information about who the cake was for, flavors, techniques, etc. Sometimes those details come across in the photos I take and post on my website and sometimes the photos are just too understated. Even though two years have passed (I should have been blogging this whole time) I have decided to go back maybe a year and post some of the more bigger jobs rather than share all the minute ones in between. So, please excuse the "back blogging" on the past year and enjoy the stories behind each one of my creations.